Itineraries
About Itineraries
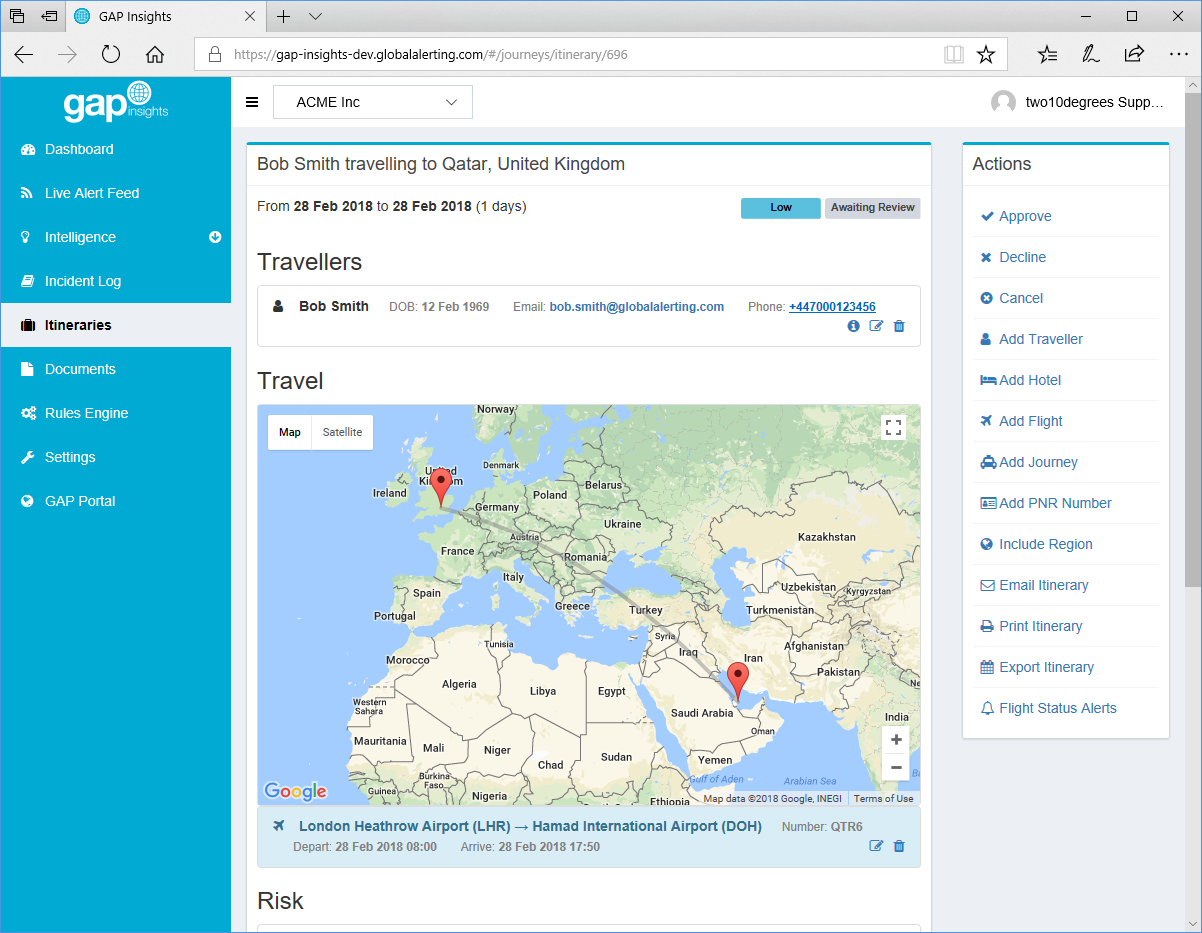
GAP Insights allows you to create, store and analyse travel itineraries. An Itinerary can consist of multiple segments (such as hotel stays, car rental, flights, etc.) for one or more travellers.
GAP Insights automatically determines what regions an itinerary passes through and calculates a risk value based on highest overall risk value of said regions.
Itineraries have a status value associated with them:
| Status | Definition |
|---|---|
| Processing | The itinerary is being processed. This usually takes a few minutes. |
| Awaiting Review | The itinerary either failed to be processed, is missing required traveller information or is yet to be approved or declined. |
| Approved | The itinerary is approved for travel. |
| Declined | The itinerary is not approved for travel. |
Creating Itineraries
GAP Insights can accept itineraries via email. These itineraries are converted into a structured format and stored in Insights. Please contact the Support Desk should you require assistance in determining the correct email address to use.
When an itinerary email is forwarded to GAP Insights, a blank itinerary placeholder is created. This placeholder appears with a “Processing” state under the “Pending” tab on the “Itineraries” screen. It can take a few minutes to parse an itinerary. If we are unable to parse an itinerary, it will be marked as “Failed” and some or all of it may need to be transcribed manually. In this case, the original email can be viewed by opening the failed itinerary placeholder and clicking on “Open Original Email” from the “Actions” menu.
Note: We support the email formats used by most major travel providers. Other formats can be supported upon request.
Note: When using email forwarding to load itineraries, not all required traveller information may be captured. In this case, itineraries are marked as having incomplete traveller information and the itinerary cannot be automatically approved until this information is added.
Manual Entry
To create a new itinerary:
- Click “Itineraries” from the left-hand side navigation menu
-
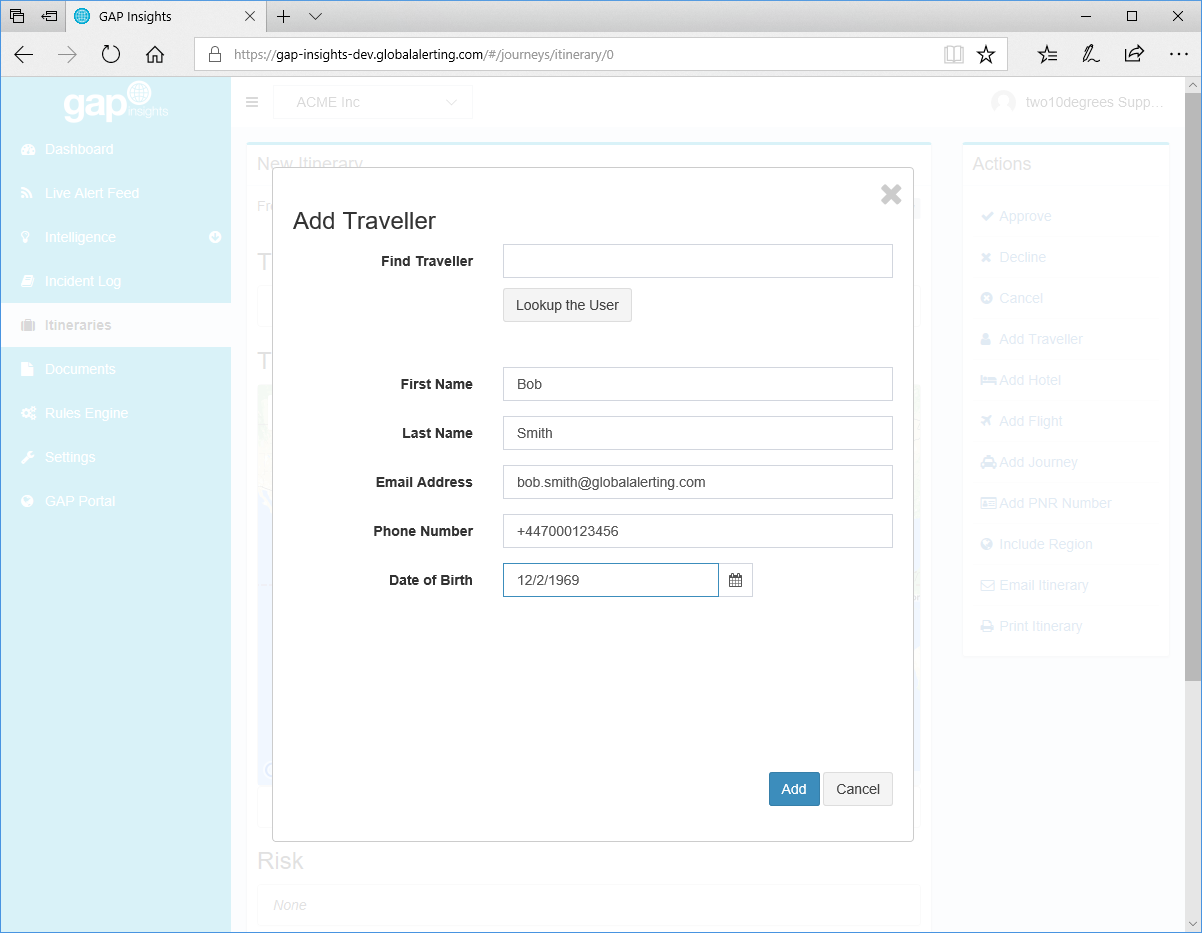
Firstly, add the travellers by clicking “Add Traveller”
- Enter a name and click “Lookup the User” to check if a user account already exists in your GAP tenant. If it does, select if from the list.
- Complete any additional missing information and click “Add”
-
Add flights, hotels and overland journeys as required
-
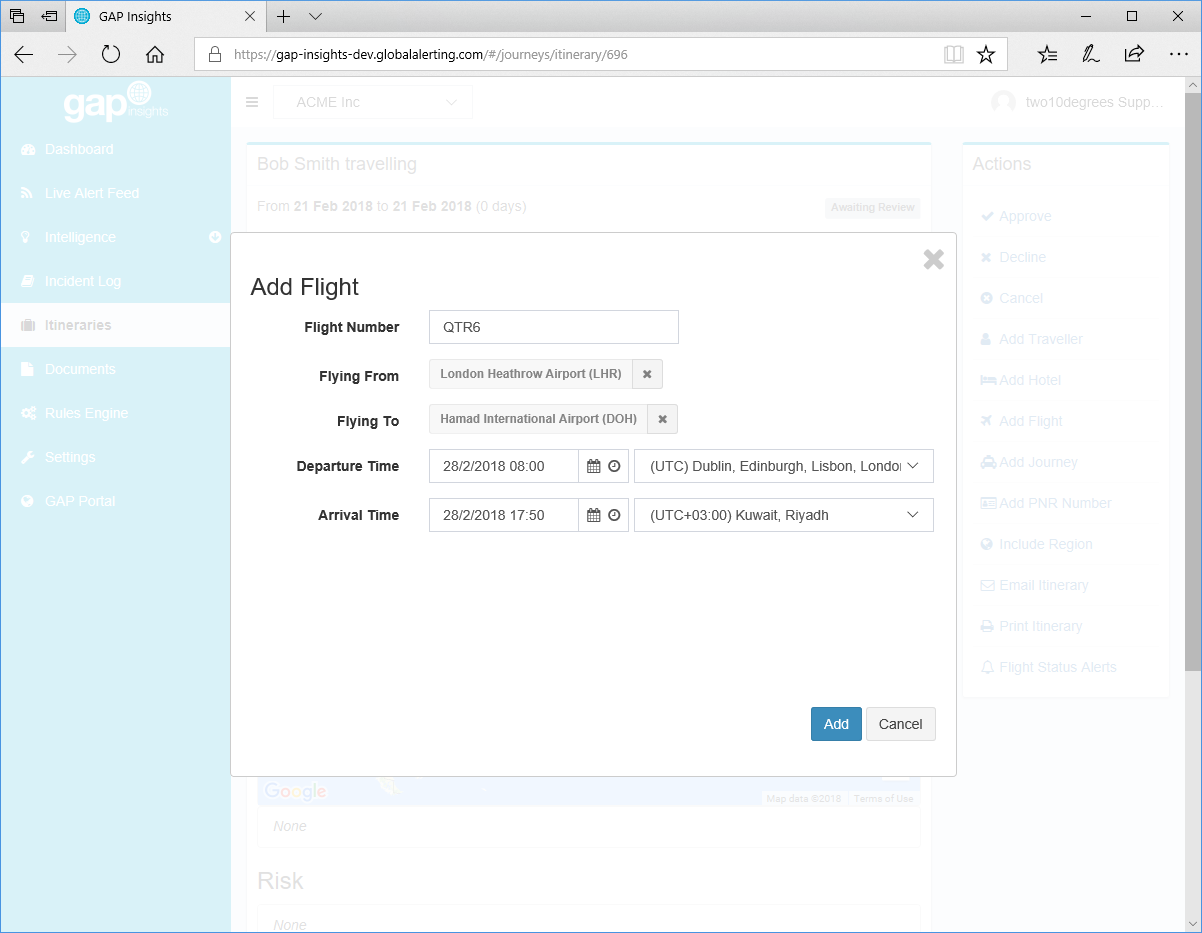
For flights, click “Add Flight”
- Enter the flight number
- Select the departure date from the date picker
- Click "Lookup Flight". The details of the flight should then appear.
- Click "Add"
-
For flights, click “Add Flight”
-
For hotels, click "Add Hotel"
- Enter the hotel name
- Begin entering part of the address and click “Lookup the Address”. If found, select the hotel from the list.
- Enter the arrival and departure times
- Click "Add"
-
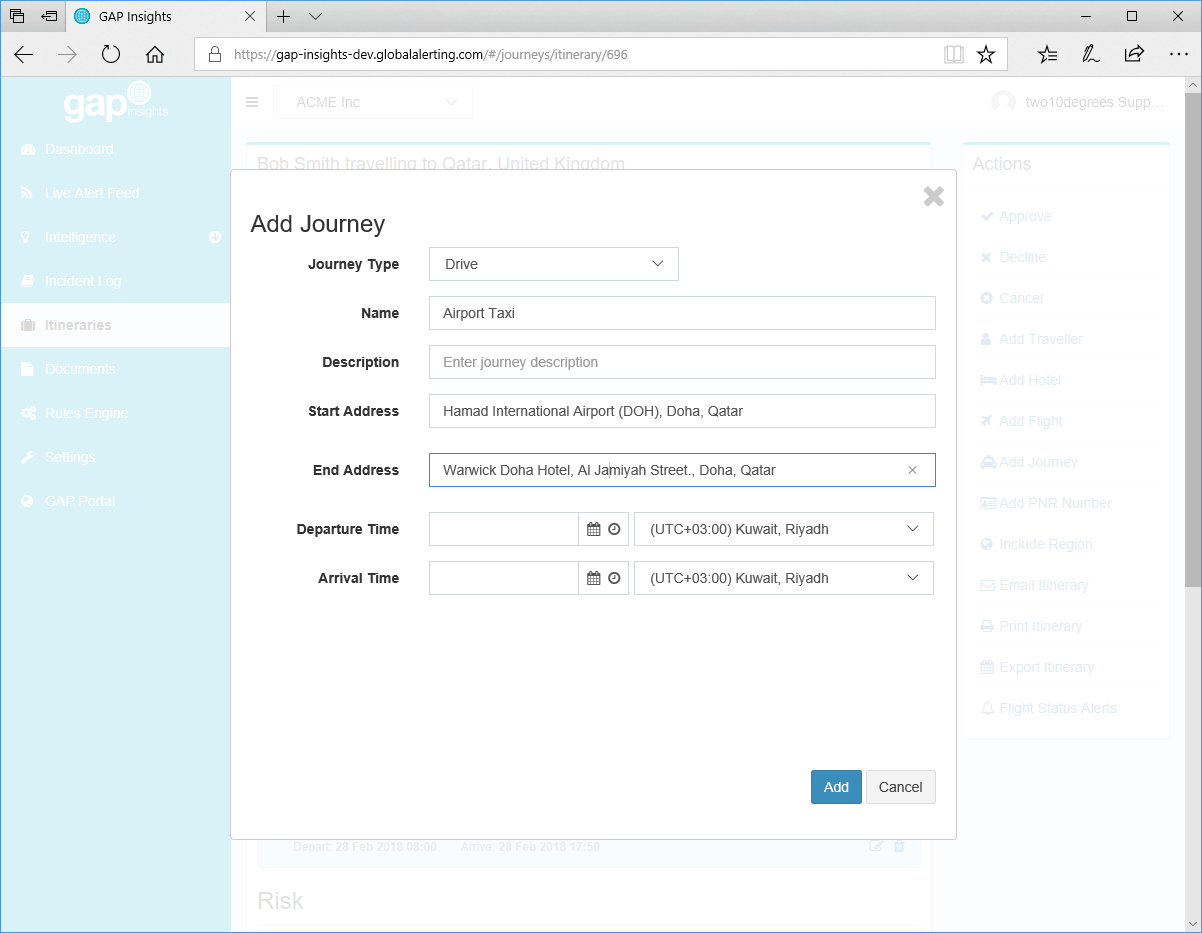
For other journey types, click “Add Journey”
- Select the type of journey from the “Journey Type” drop-down list
- Enter a name and description for the journey
- Begin entering a start address in the “Address From” text box, selecting the correct value from the auto-complete drop-down list
- Begin entering an end address in the “Address To” text box, selecting the correct value from the auto-complete drop-down list
- Enter a departure and arrival time
- Click "Add"
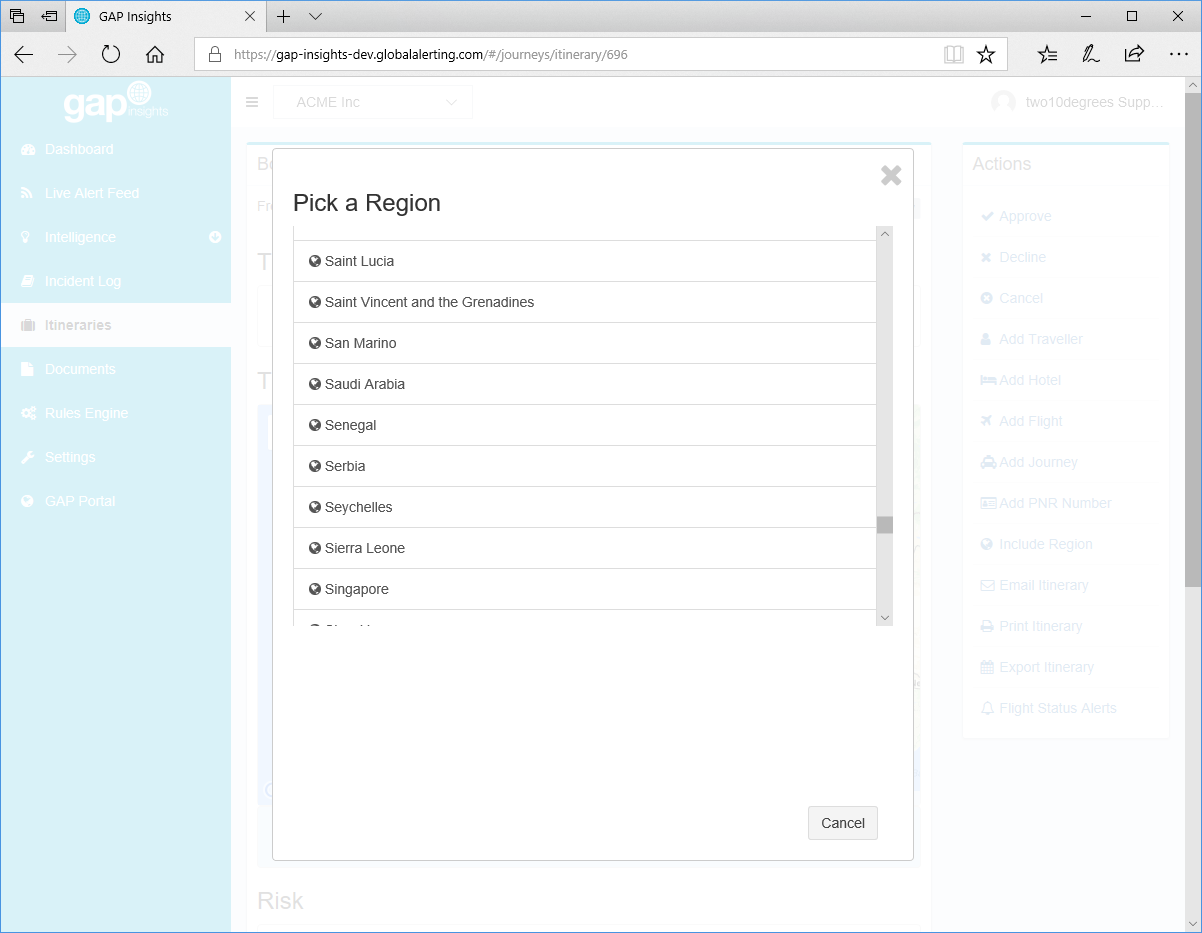
- To manually include a region in the risk calculation (which is not already included based on the itinerary segments), click “Include Region”, click on a region from the picker
- Click “Approve” to approve the itinerary
Note: When adding a car journey, the route chosen is based on the quickest route recommended by Google Maps. The actual route taken by the traveller may differ.
Copying an Itinerary
- Click on the “copy” icon next to the itinerary in the list view
- Click "OK" at the dialog prompt
Editing an Itinerary
To edit an existing itinerary, click on the “edit” icon next to the itinerary in the list view. Any changes to an itinerary may cause the risk level to be re-calculated.
Adding a PNR Number
A PNR (Passenger Name Record) number is a unique identifier for an itinerary.
- Click on the “edit” icon next to the itinerary in the list view
- Click "Add PNR Number" from the right-hand side "Actions" menu
- Enter the PNR number into the text box and click "Yes"

Cancelling an Itinerary
Cancelling an itinerary will keep a copy of it in GAP Insights but will mark it as cancelled and exclude it from being processed by the rules engine (for example, travellers will not receive alerts).
- Click on the “edit” icon next to the itinerary in the list view
- Click "Cancel" from the "Actions" menu on the right-hand side
- When prompted to confirm, click "Yes
Declining an Itinerary
- Click on the “edit” icon next to the itinerary in the list view
- Click "Decline" from the "Actions" menu on the right-hand side
Deleting an Itinerary
Note: deleting an itinerary is permanent. Once deleted, an itinerary cannot be retrieved.
- Click on the “trash can” icon next to the itinerary in the list view
- When prompted to confirm, click "Yes
Sharing an Itinerary
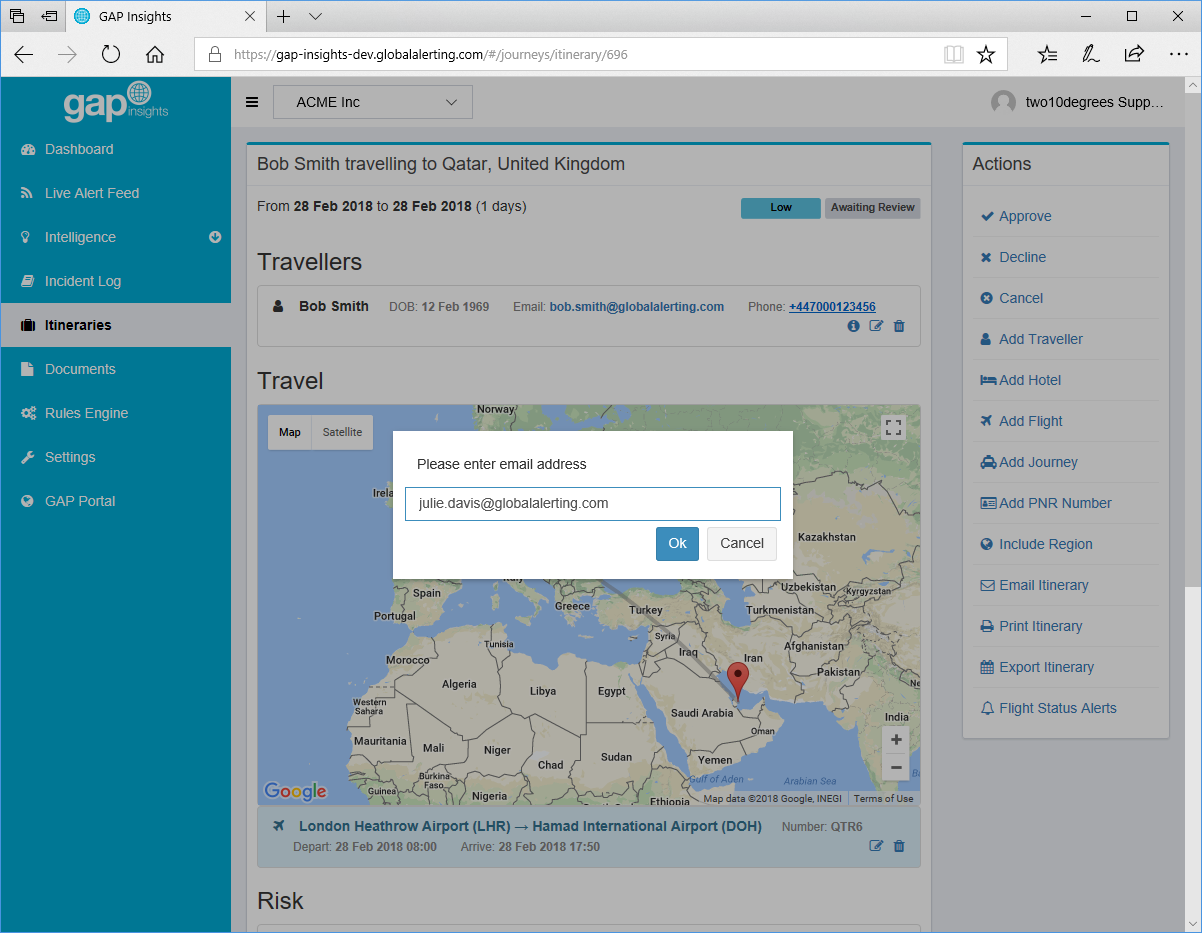
Emailing an Itinerary
- Click on the “edit” icon next to the itinerary in the list view
- Click "Email Itinerary" from the "Actions" menu on the right-hand side
- Enter an e-mail address in the text box and click "Yes"
Exporting an Itinerary
You can export an itinerary to an .ics file for importing into calendaring programs such as Microsoft Outlook.
- Click on the “edit” icon next to the itinerary in the list view
- Click "Export Itinerary" from the "Actions" menu on the right-hand side
- Follow your web browser's prompts to download the file to your computer
Printing an Itinerary
- Click on the “edit” icon next to the itinerary in the list view
- Click "Print Itinerary" from the "Actions" menu on the right-hand side
- Follow your web browser's prompts to print
Adding Notes
You can add a free-text note to an itinerary
- Click on the “edit” icon next to the itinerary in the list view
- Click "Add Notes" from the "Actions" menu on the right-hand side
- Enter text as required and click "Save"
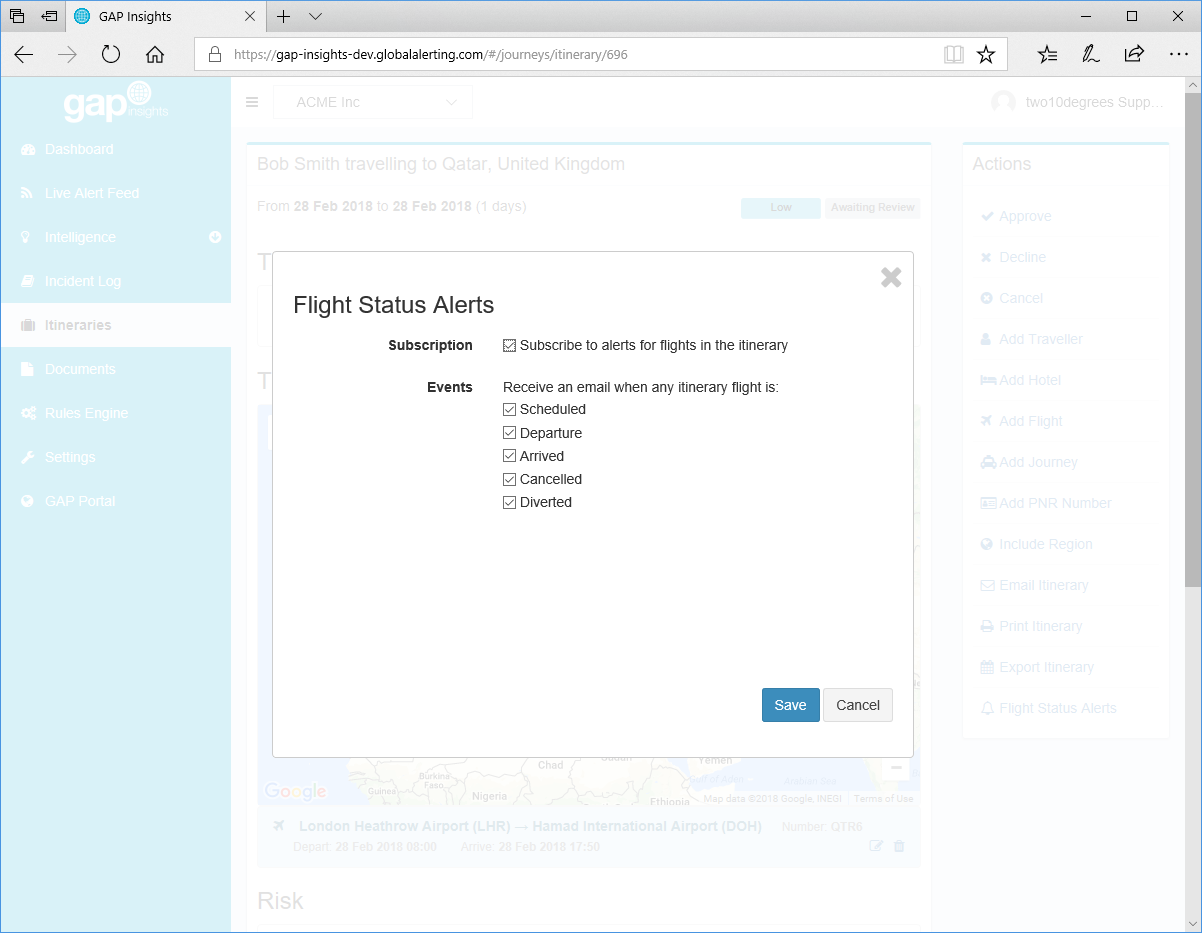
Flight Status Alerts
You can subscribe to be notified by e-mail when flights included in an itinerary are scheduled, delayed, cancelled, diverted, depart or arrive.
- Click on the “edit” icon next to the itinerary in the list view
- Click "Flight Status Alerts" from the "Actions" menu on the right-hand side
- Check the "Subscribe to alerts for flights in this itinerary" check box
- Uncheck any events about which you do not wish to receive e-mails
- Click "Save"