How to register an Iridium GO! on GAP
To use an Iridium GO! with the portal, you must have an account on the GAP portal.
1. Set up a new device on the portal
- Log on to the GAP portal using an account with privileges for adding devices.
- Click on the "Devices" tab in the top left menu.
- Click the “+” icon in the Devices area.
- Complete the “Add Device” form, entering the device’s IMEI in the “Device Id” field, the device’s phone number in the “Phone Number” field and selecting “IridiumGO!” from the “Device Type” drop-down list.
- When complete, click the “OK” button.
2. Configure the Iridium GO! With the Web Interface
Tracking
- Log on to the device’s web administrative interface. Please refer to the device’s documentation if you do not know how to do this.
- Click “Location Options” from the banner menu:
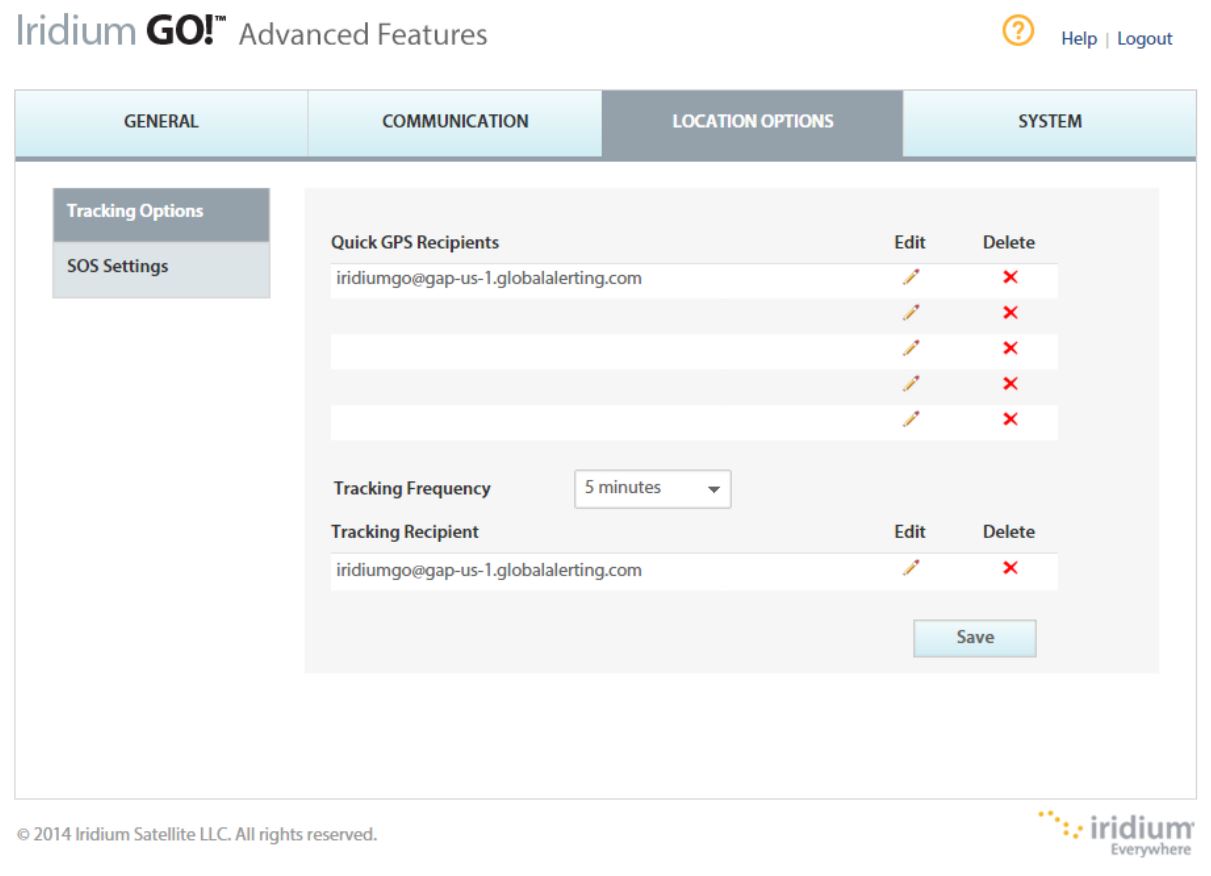
- Enter the following e-mail address in the “Tracking Recipient” text box: iridiumgo@gap-us-1.globalalerting.com
- Select the desired tracking frequency from the “Tracking Frequency” drop-down list.
- Click “Save”
If required, you can also enter the email address into the “Quick GPS Recipients” list to have Quick GPS messages also forwarded and displayed on GAP.
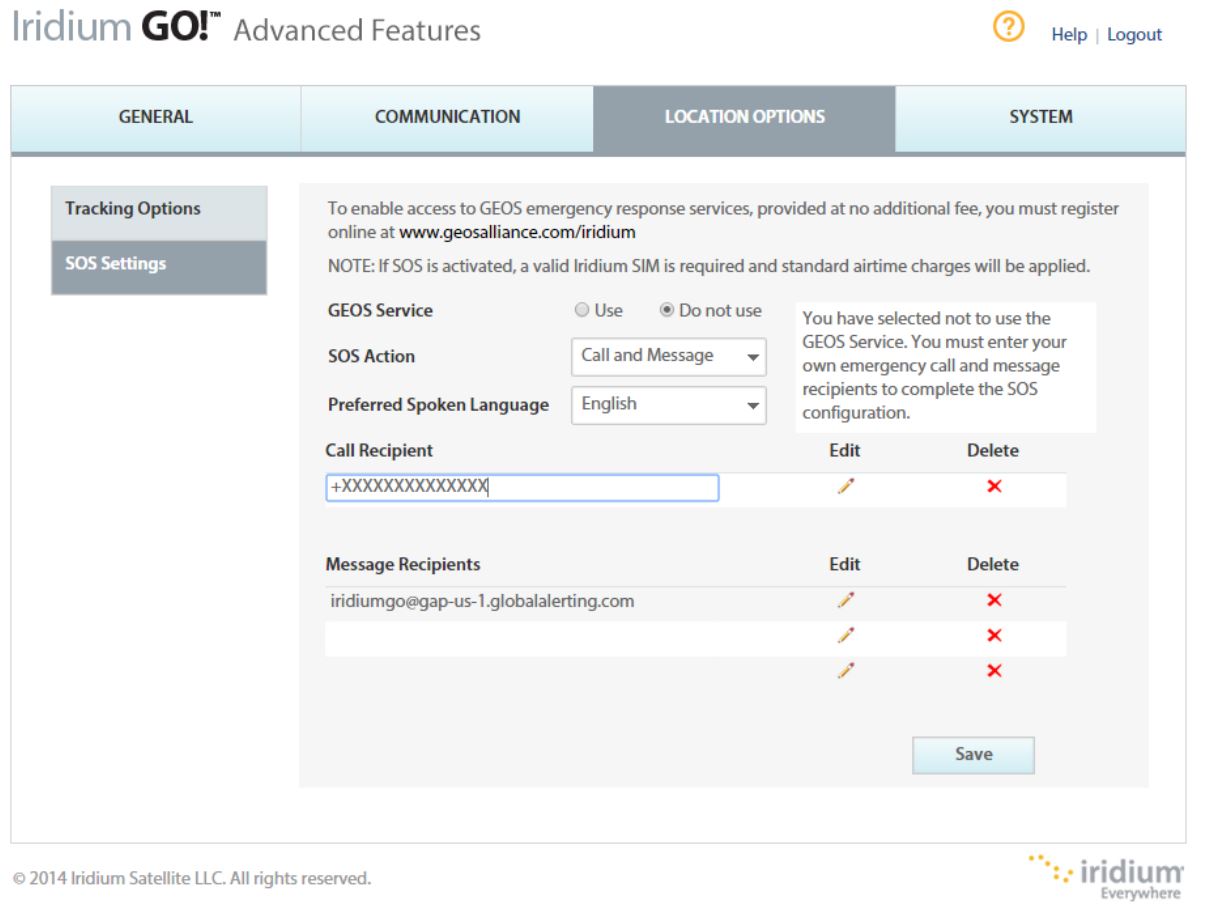
Configuring SOS
Configuring the SOS recipients is similar to tracking recipients above. The Iridium GO! will initiate a call to the number specified. If required, we can provide a dedicated number that will automatically answer and record any voice communications.
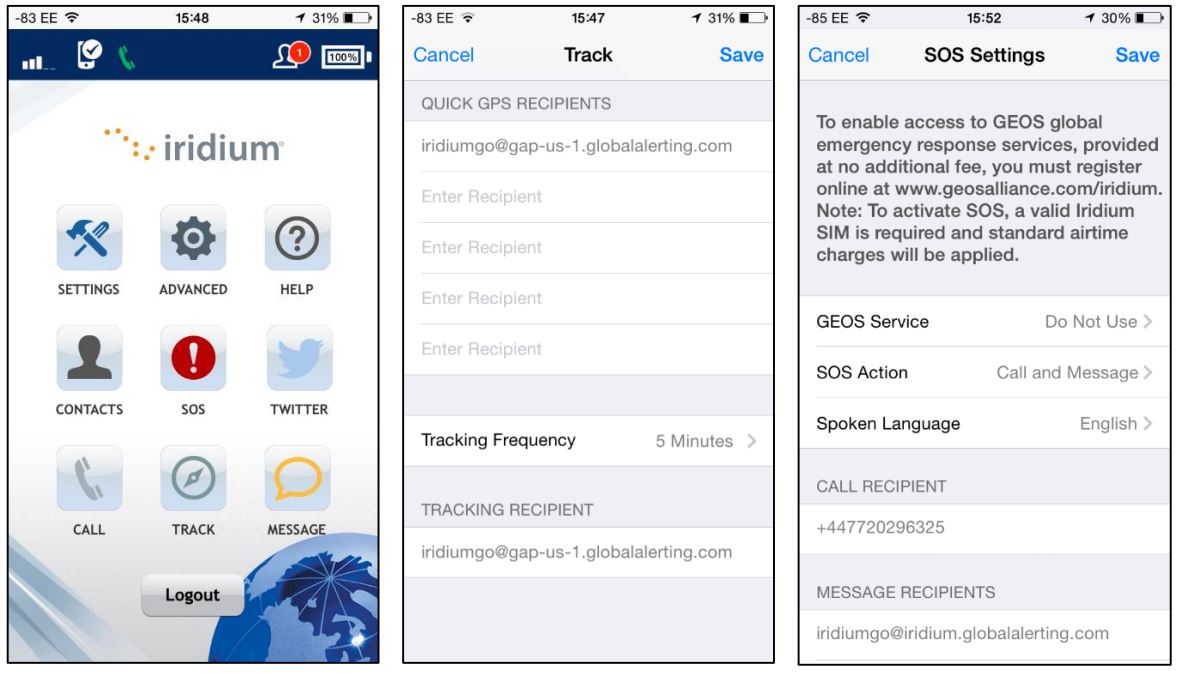
Configure the Iridium GO! With the Smartphone App
You can also configure the Iridium GO! using the “Settings” feature of the Iridium GO! app.